Comment mesurer, fabriquer et installer des moustiquaires de fenêtre — guides DIY gratuits
To measure a window for a replacement screen: measure the width at top and bottom of the screen channel (use the smaller number), measure the height on both sides (use the smaller number), measure in inches to the nearest 1/16", and note the channel type. For doors: measure frame opening width inside edge to inside edge, height from threshold to top, and note handle side. Always measure twice — custom screens cannot be returned.
Tout ce qu'il vous faut pour mesurer, choisir et installer vos moustiquaires — sans aucun appel téléphonique.
Comment mesurer vos moustiquaires
Des mesures précises sont la clé d'un ajustement parfait. Suivez ces étapes pour les fenêtres et les portes.
Moustiquaires de fenêtre
- 1.Mesurez la largeur en haut et en bas de la rainure de la moustiquaire — utilisez la plus petite mesure
- 2.Mesurez la hauteur des côtés gauche et droit — utilisez la plus petite mesure
- 3.Mesurez en pouces au 1/16 po près
- 4.Notez le type de rebord/rainure (standard, affleurant, etc.)
Moustiquaires de porte
- 1.Mesurez la largeur de l'ouverture du cadre de porte (de bord intérieur à bord intérieur)
- 2.Mesurez la hauteur du seuil jusqu'au haut du cadre
- 3.Pour les portes coulissantes : mesurez la largeur et la hauteur du rail
- 4.Notez de quel côté la poignée doit se trouver
Conseil de pro
Mesurez deux fois et commandez une fois. Nous fabriquons selon vos dimensions exactes — une moustiquaire sur mesure ne peut pas être retournée.
Choisir la bonne toile
Différents types de toile servent à différents usages. Voici comment choisir la bonne.
Fibre de verre standard
Idéale pour la plupart des usages résidentiels. Économique et efficace.
- • Bonne visibilité et bonne circulation de l'air
- • Facile à installer et à réparer
- • Option la plus abordable
Toile résistante aux animaux
Polyester enduit de vinyle robuste qui résiste aux égratignures et aux déchirures.
- • 7 fois plus résistante que la toile standard
- • Résiste aux griffes et aux sauts des animaux
- • Visibilité légèrement réduite
Toile pare-soleil
Bloque les rayons UV et réduit la chaleur tout en maintenant la circulation de l'air.
- • Bloque jusqu'à 80 % des rayons UV
- • Réduit l'éblouissement et la chaleur
- • Idéale pour les fenêtres orientées au sud
Toile en aluminium
Option métallique durable pour les zones à fort passage ou de sécurité.
- • Ne s'affaisse pas et ne s'étire pas avec le temps
- • Résistante au feu
- • Plus visible que la fibre de verre
Comment installer vos moustiquaires
Installer des moustiquaires est simple. Voici ce que vous devez savoir.
Outils nécessaires
- • Outil à rouleau pour spline (inclus dans les kits)
- • Couteau utilitaire ou ciseaux
- • Surface de travail plane
- • Pinces (facultatives mais utiles)
Étapes d'installation
- 1.Assemblez les pièces du cadre à l'aide des connecteurs de coin
- 2.Posez la toile sur le cadre avec un débord de 1 po sur tous les côtés
- 3.En commençant par un coin, enfoncez le spline dans la rainure avec le rouleau
- 4.Faites le tour du cadre en gardant la toile tendue
- 5.Coupez l'excédent de toile avec un couteau utilitaire
- 6.Installez les languettes de tirage ou la quincaillerie au besoin
Erreurs DIY courantes à éviter
Épargnez-vous du temps et de la frustration en évitant ces pièges courants.
Mesurer l'ancienne moustiquaire au lieu du cadre
Les anciennes moustiquaires peuvent s'être étirées ou rétrécies — mesurez toujours l'ouverture du cadre.
Utiliser une mauvaise taille de spline
Un spline trop petit ne tiendra pas ; trop gros, il n'entrera pas. Adaptez-le à la rainure de votre cadre.
Trop tendre la toile
Une toile trop tendue peut déformer le cadre. Gardez-la tendue mais pas étirée.
Ne pas tenir compte des coins du cadre
Assurez-vous que les coins sont bien alignés avant de commencer le spline.
Do You Need a Sill Adapter?
Retractable screens mount to a flat, flush surface on all four sides — like a picture frame. If your door opening doesn't have this, you'll need a sill adapter.
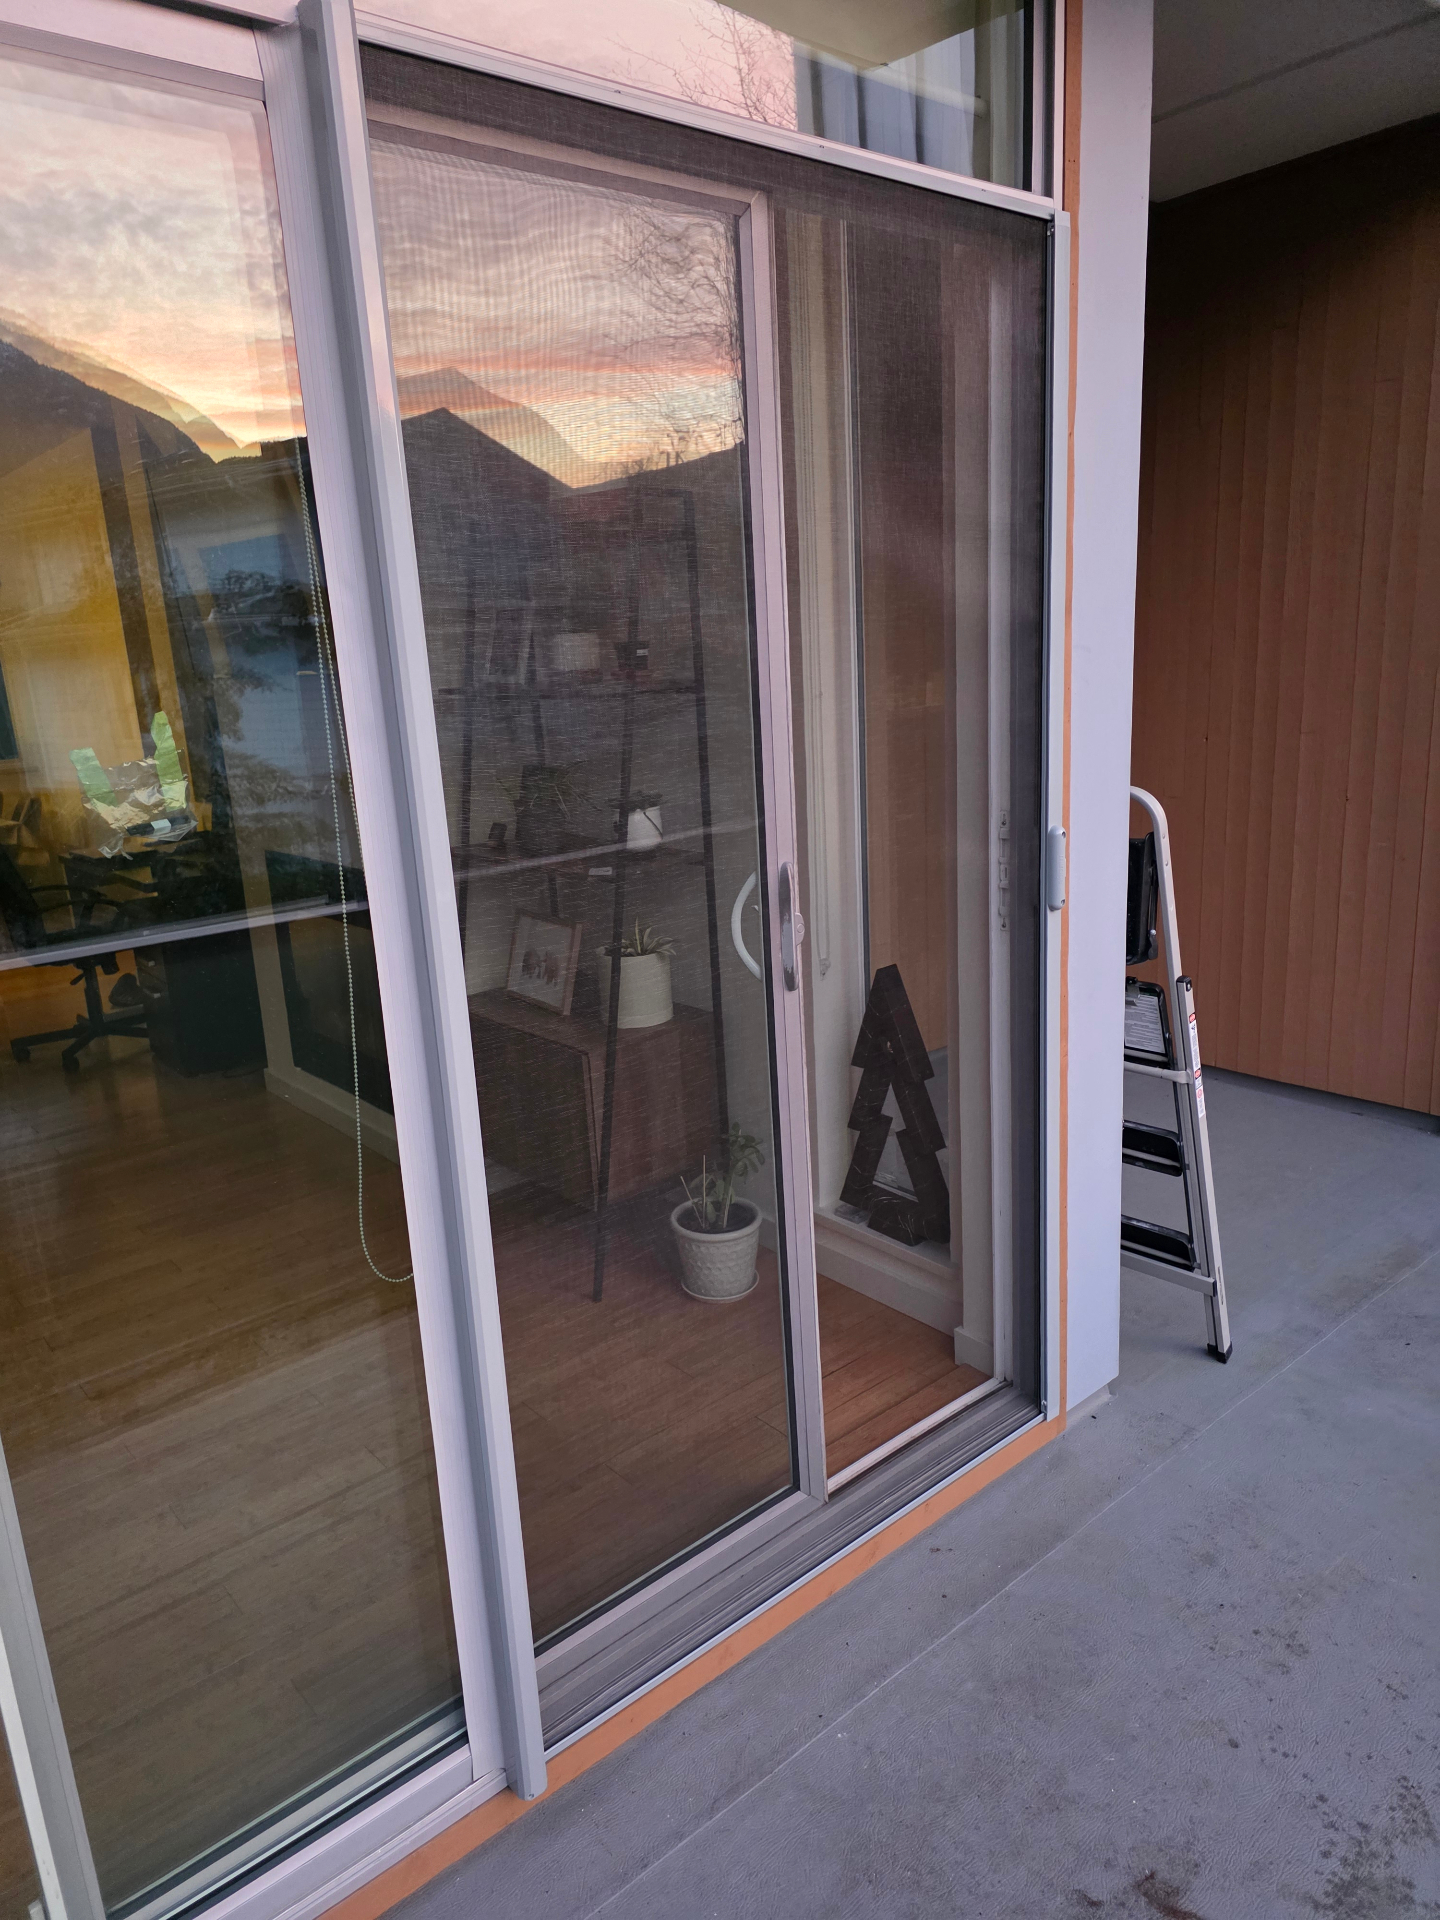
Full door view
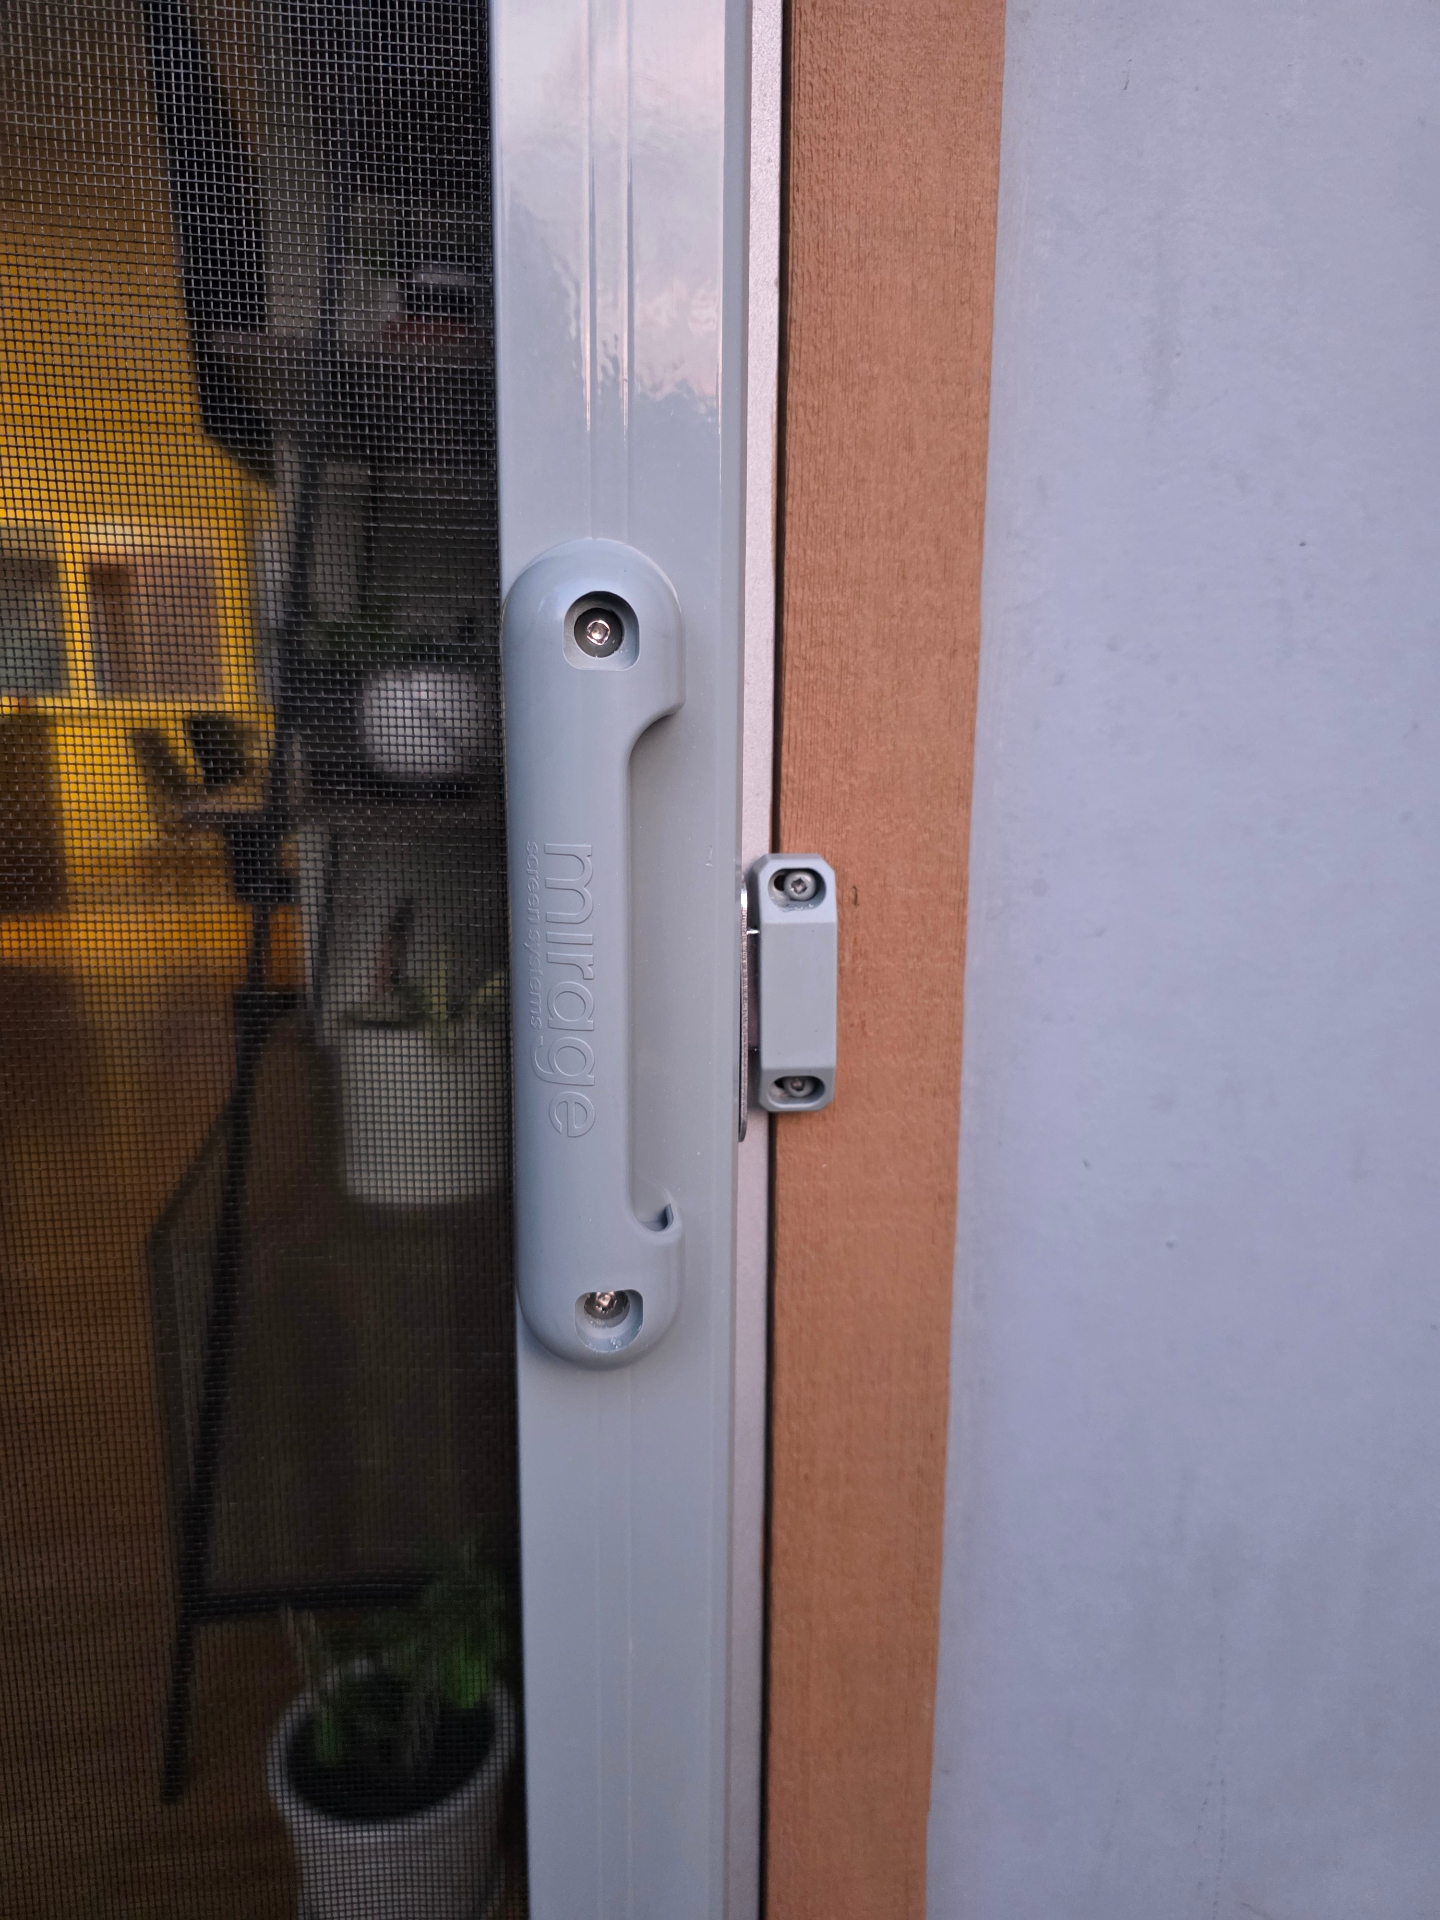
Handle detail
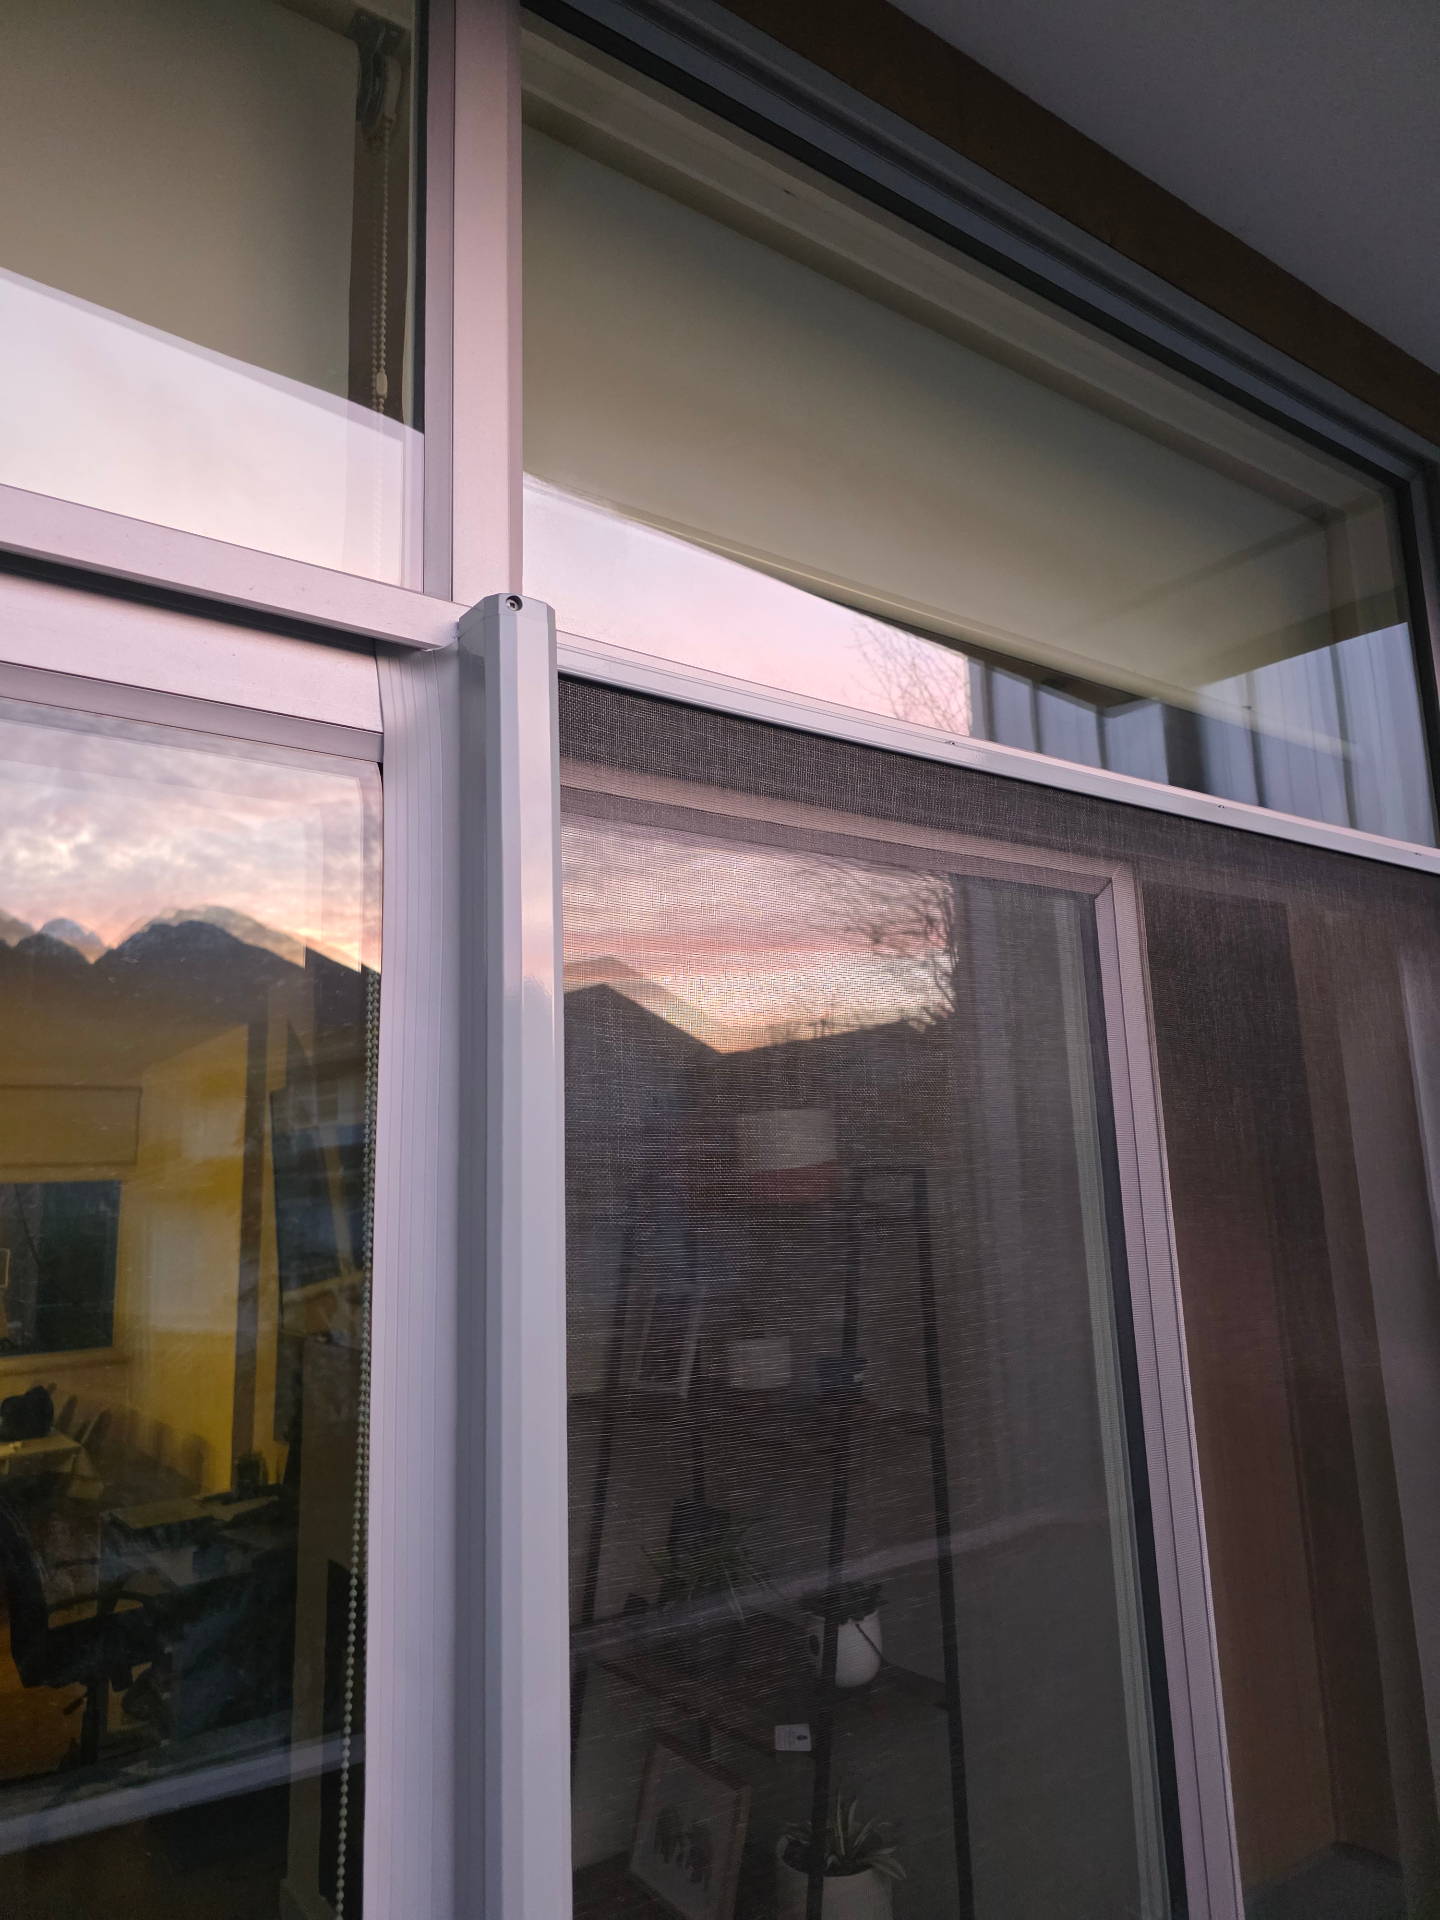
Side track mounting
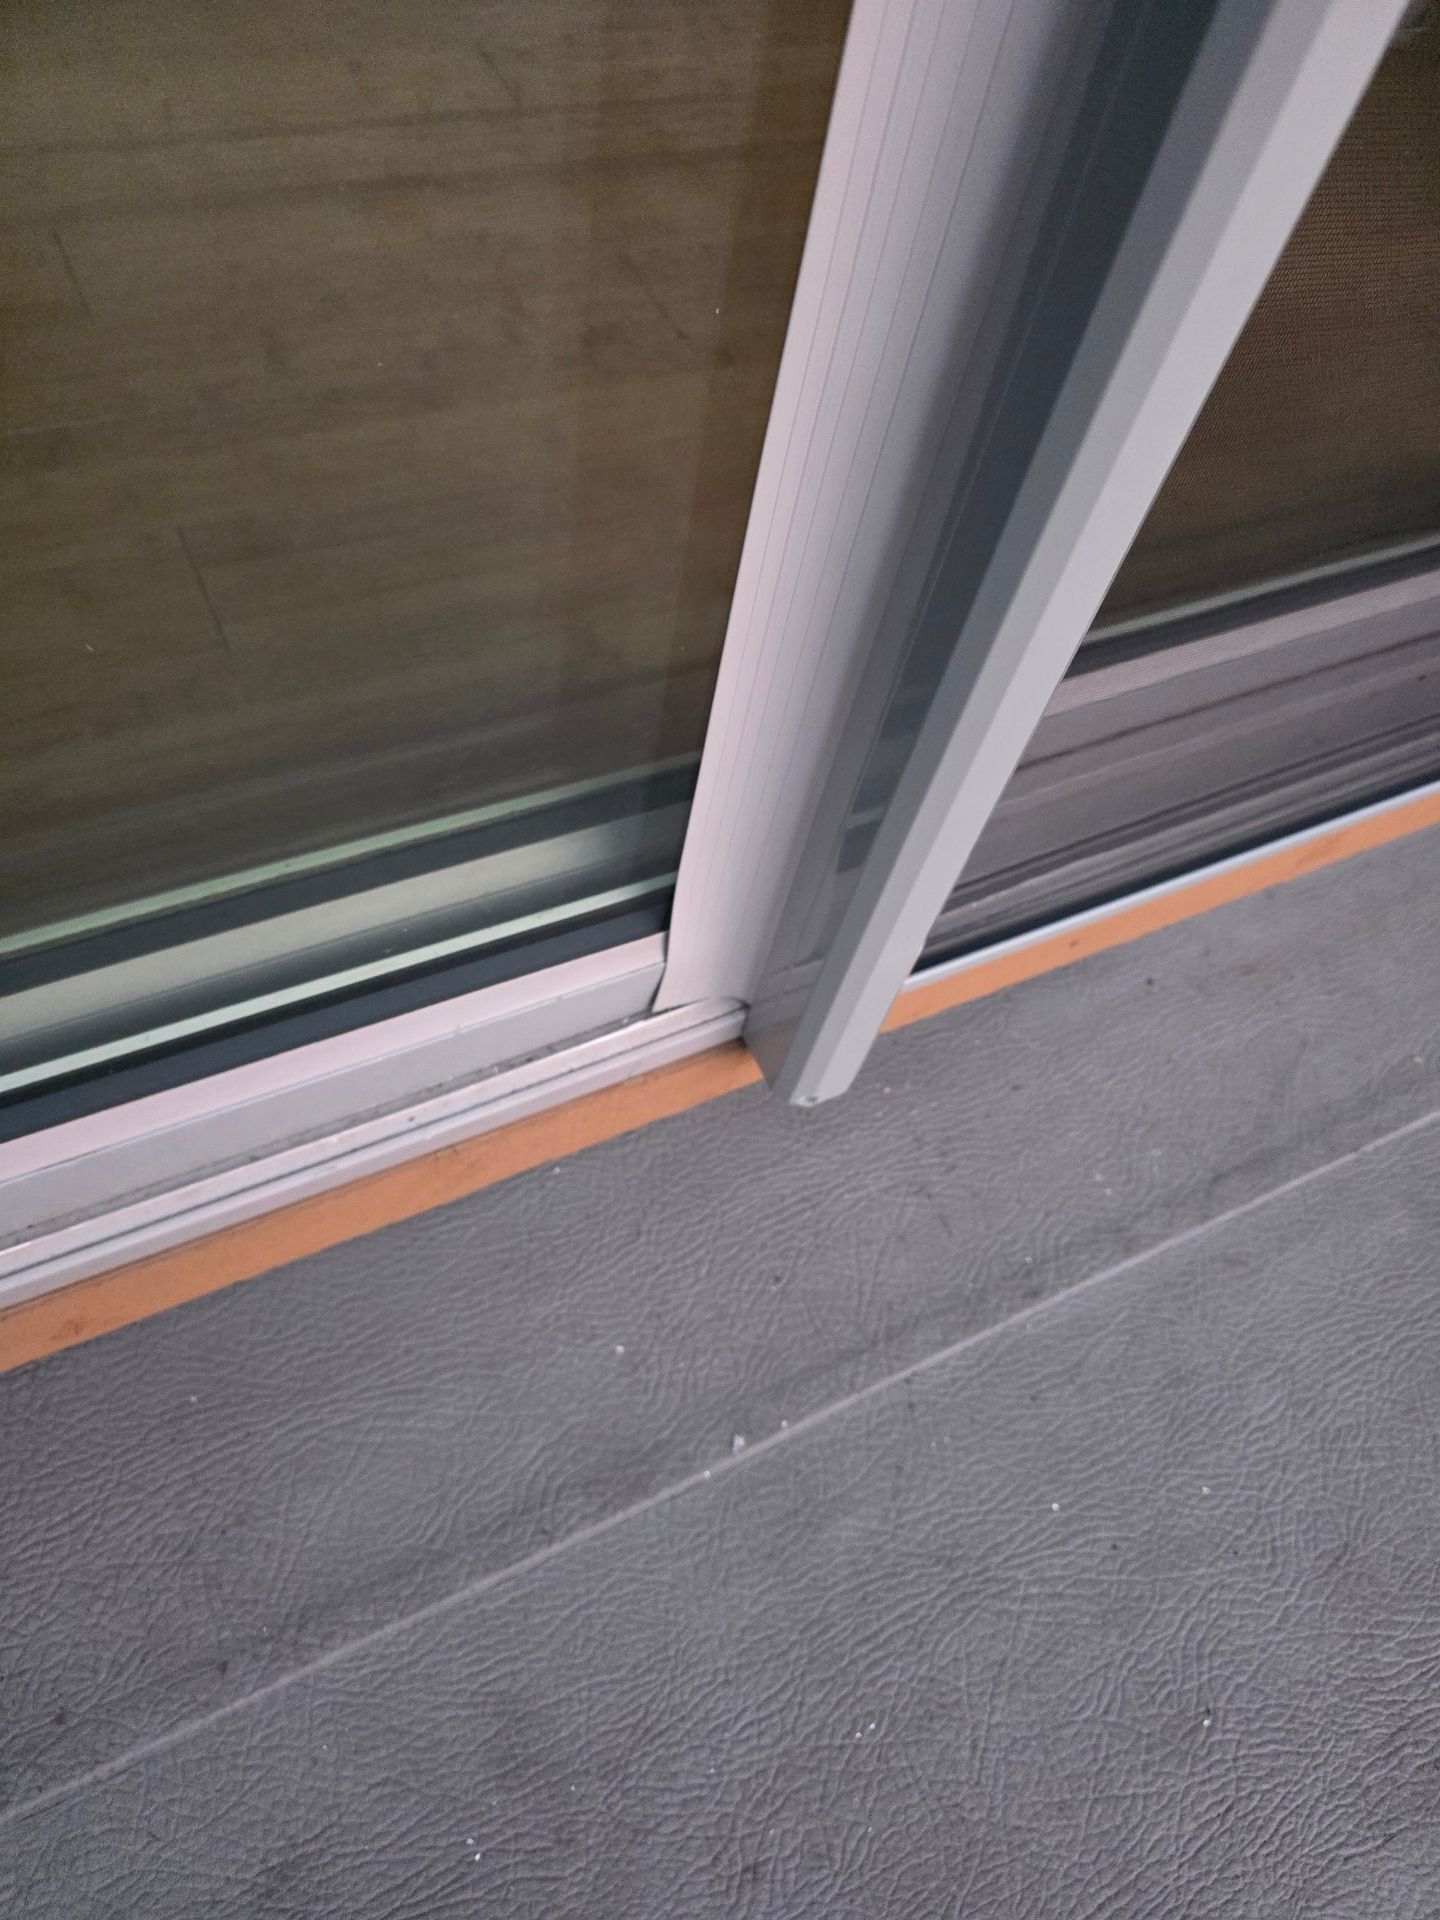
Sill/threshold detail
No Adapter Needed
Your opening is ready for direct mounting if you have:
- Flat, flush surface on all four sides
- Threshold is level with your floor or deck
- Standard sliding door frame with even tracks
- Opening resembles a "picture frame"
Sill Adapter Required
You'll need an adapter if your opening has:
- Recessed or sunken door track
- Sloped or angled threshold
- Missing flush surface on any side
- Uneven or textured mounting surfaces
Need a Sill Adapter?
Sill adapters are custom-made to fit your specific opening. Contact us for a quote.
Mesh Type Comparison
| Mesh Type | Best For | Strength | Visibility | Price | UV Block |
|---|---|---|---|---|---|
| Standard Fiberglass | Most homes, general use | Good (3-5 years) | Good | $ | Minimal |
| Pet-Resistant | Homes with cats or dogs | 7x stronger than standard | Slightly reduced | $$ | Minimal |
| Solar Shade | South/west windows, hot climates | Good | Reduced (tinted) | $$ | Up to 80% |
| Aluminum | High-traffic, security | Excellent (10+ years) | Good | $$ | Minimal |
| No-See-Um | Near water, heavy mosquito areas | Good | Slightly reduced | $$ | Minimal |
| BetterVue Invisible | View-critical windows | Good | 20% better than standard | $$$ | Minimal |
Prêt à commencer ?
Commencer votre commande